


Dynamics User Group Meetup on End2End testing with Sören
11. June 2023
Virtual Write is the new Dual Write
26. July 2024


From July 15, 2024, service-based authentication (Client Key & Client Secret) will be discontinued. It is therefore necessary to change the authentication for all devices by this date.
Microsoft now generally offers 3 options here:
| Device code flow authentication |
One Microsoft Entra ID user account (per device) |
Microsoft Entra ID user account for each human worker |
| App generates device code, which must be entered by an admin together with the user name and password of an Entra ID account in an online form. | A device-specific Entra ID is used for authentication (you can also use one and the same one for all devices). The warehouse employee then logs in as usual with the warehouse worker's user ID and password (warehouse worker). | The employee's personal Entra ID account is used to log in to the device. By linking the user (EntraID) with an employee (HCMWorker & Warehouse worker), this is sufficient for logging in. |
| Automatic logout after 90 days of inactivity | Automatic logout after 90 days | Automatic logout after 90 days |
| MDM systems (e.g. Intune) are not supported | MDM systems (e.g. Intune) are supported | MDM systems (e.g. Intune) are supported |
| - | SSO possible | SSO possible |
As not all warehouse employees usually need their own Entra ID account and device code flow authentication does not support MDM systems, we see authentication via an Entra ID user account (per device) as the most common option in future. Therefore, a quick guide to setting this up follows.
Setting up user-based authentication for the Warehouse Management Mobile App
User-based authentication for the Warehouse Management Mobile App is set up in 2 steps:
- Setting up a web service application in Microsoft Entra (Azure)
- Setting up the connection in the Warehouse Management Mobile App
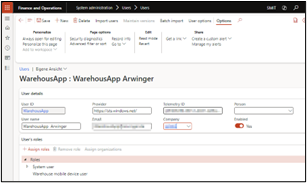
As a prerequisite, an Entra user must exist and also be created as a user in Dynamics 365 Finance and Supply Chain Management with the corresponding role (Warehouse mobile device user).
Setting up a web service application in Microsoft Entra (Azure)
- Open the Azure portal(http://portal.azure.com) and log in there with an admin account.
- In the Azure portal, select Microsoft Entra ID > App Registration > New Registration.
1) Enter a name for your application.
2) Select the supported account type: Accounts in this organizational directory only.
3) Then click on Register.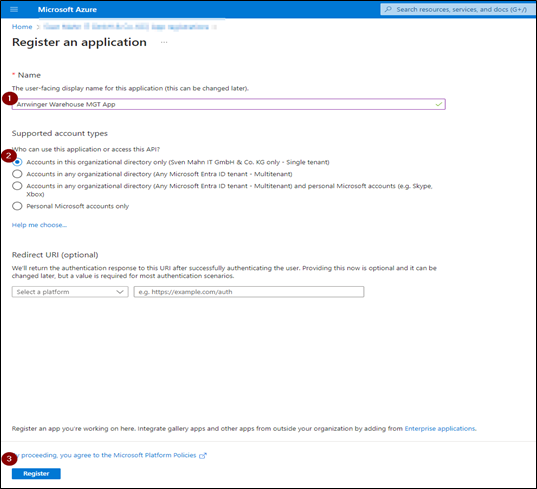
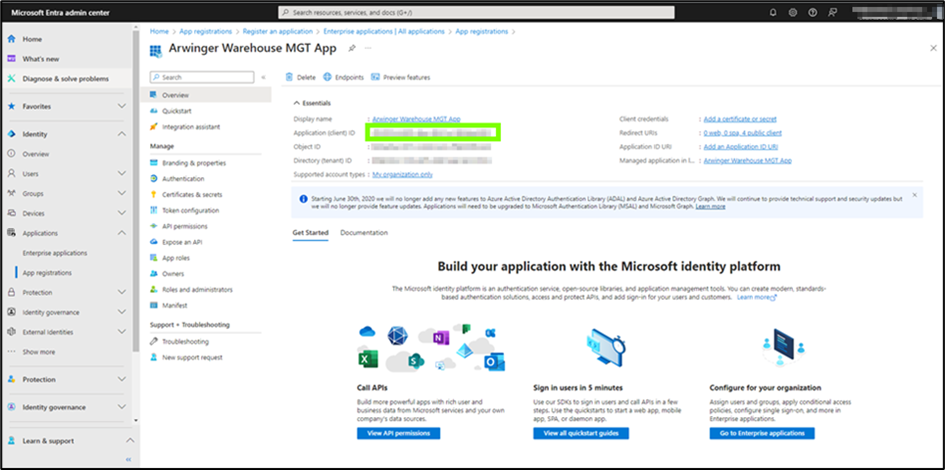
- Make a note of the application (client) ID (required later for setting up the app).
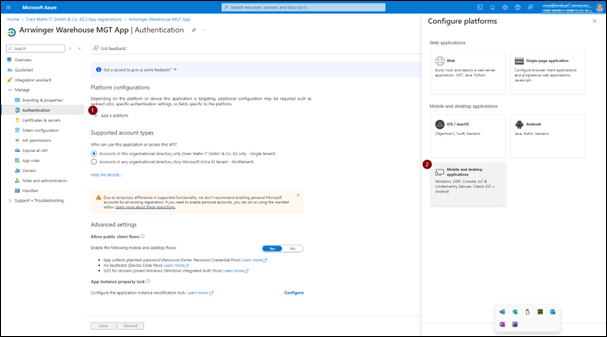
- Select the Authentication option from the left-hand menu under Manage.
1) Set the Enable the following mobile device flows parameter to Yes.
2) Save the changes.
- On the same page, click on Add a platform and then on Mobile and Desktop application.
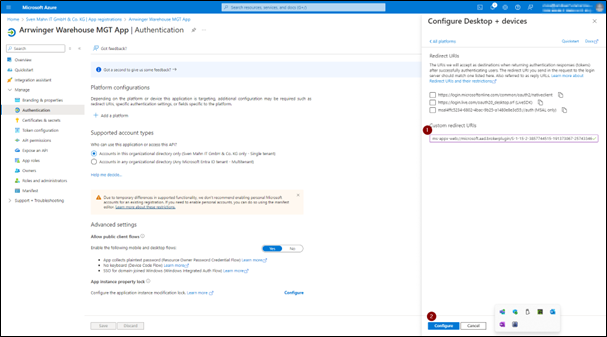
- In the Configure Desktop + Devices dialog box, set the Custom redirect URIs field to the following value: ms-appx-web://microsoft.aad.brokerplugin/S-1-15-2-3857744515-191373067-2574334635-916324744-1634607484-364543842-2321633333
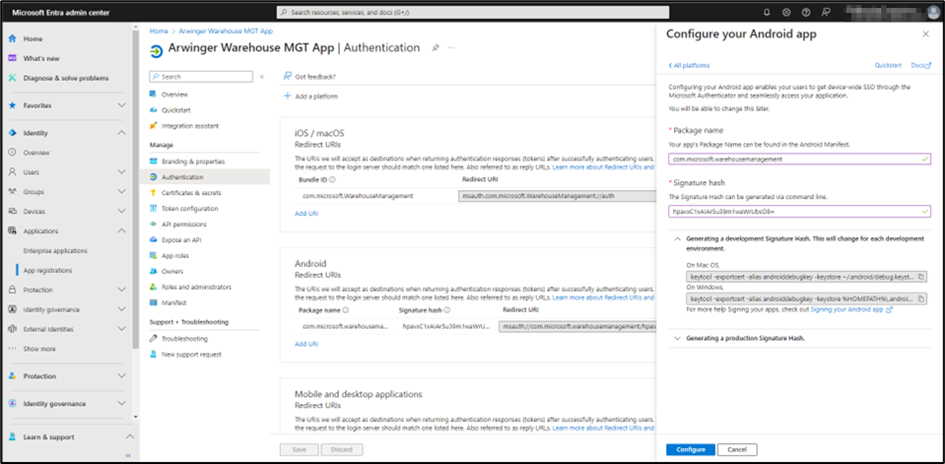
- Optional: If you are using Android devices, you should select the Add platform option again. Then select Android in the next form and enter the following:
- Package name: com.microsoft.warehousemanagement
- Signature hash: hpavxC1xAIAr5u39m1waWrUbsO8=
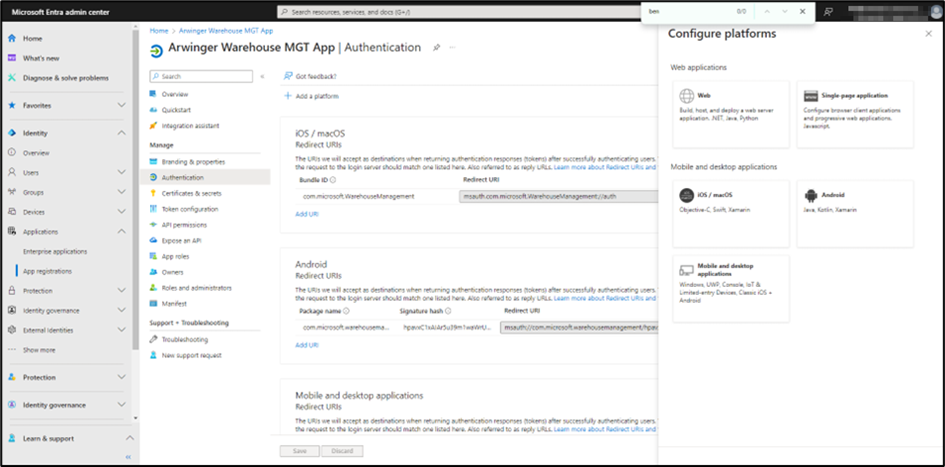
- Optional: If you are using IOS devices, you should select the Add platform option again and select iOS / Mac OS and enter the following in the field: microsoft.WarehouseManagement.
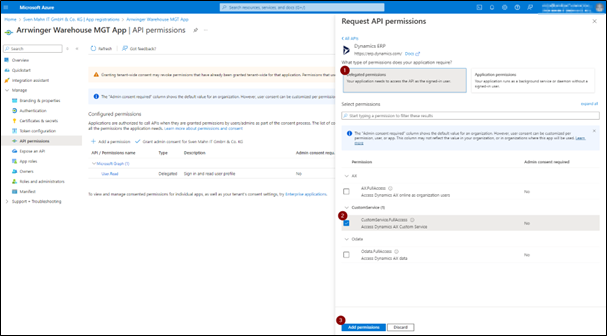
- After you have added the platform, click on API authorizations (1) in the left menu under Administration. Select Add authorization (2) and then on the Dynamics ERP subpage (3).

- In the new window, select the Delegated authorizations (1) and activate the CustomService.FullAccess (2) checkbox under Custom Service. Finally, click on Add authorization (3) to save the change.
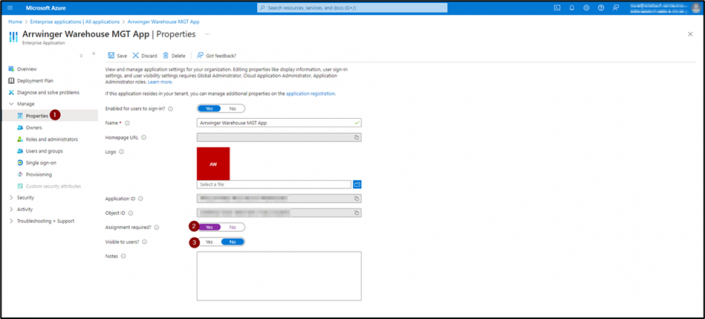
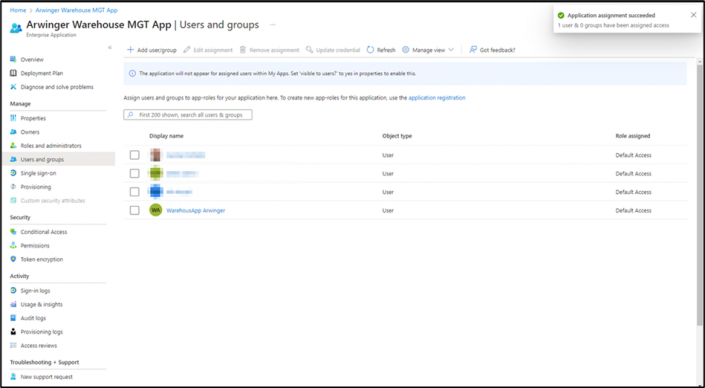
- Return to the main Azure portal page and select Microsoft Entra ID > Enter prices applications and search for your new application. From the left menu, under Administration, select Properties (1) and set and save the following values:
- Assignment required - Yes (2)
- Visible for users - No (3)
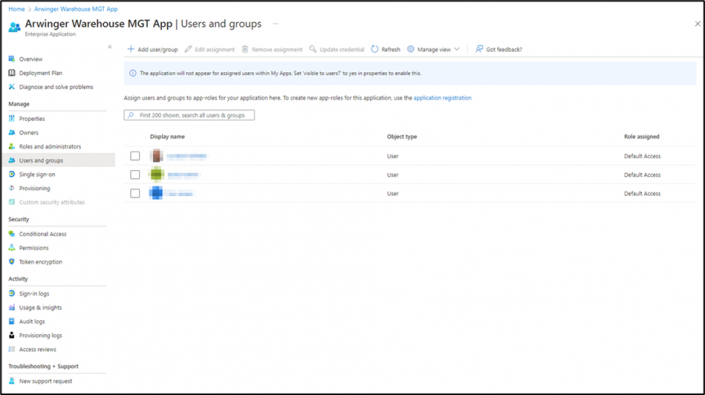
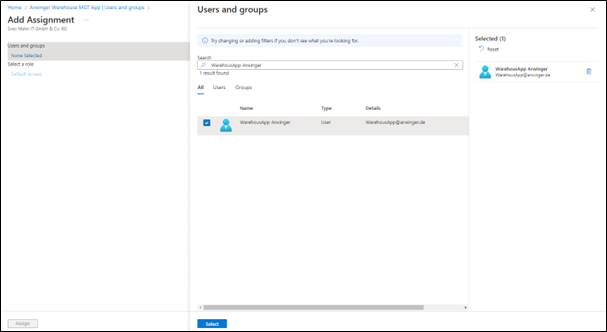
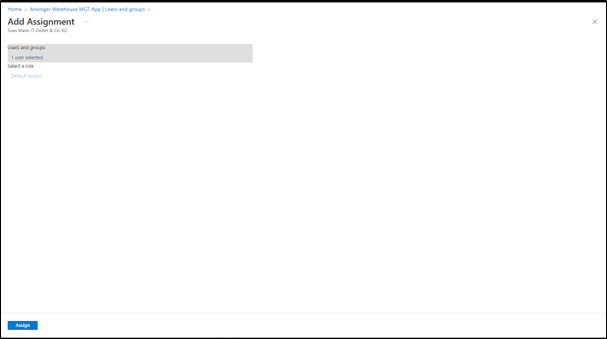
- Select Users and groups and Add users/groups from the left-hand menu. Add individual users or groups for which you want to activate authentication and save the changes.
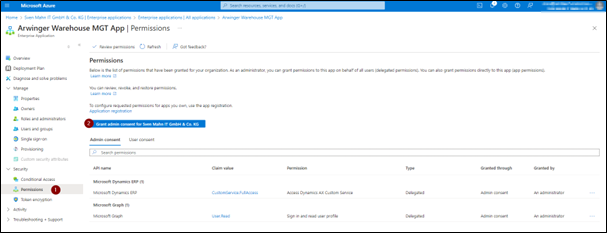
- Then select the Authorizations option (1) from the left-hand menu under Security and grant the administration consent (2).
Setting up the connection in the Warehouse Management Mobile App
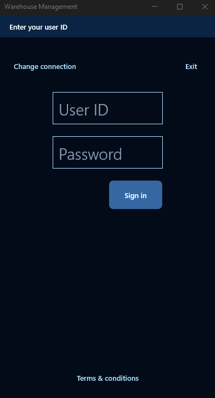
- After opening the app, click on Change connection and on the following screen on Set up connection and select Input manually.
- Enter the following data here:
- Connection Name: Give the connection a unique name.
- Environment URL: The link of the D365FSCM environment you want to connect to.
- Company: The D365FSCM client to be logged on to
- Authentication method: Username and Password
- Domain name: The name of your domain (i.e. what appears after the @ in the emails)
- Use Broker: Yes
- Cloud: Manual
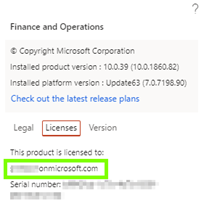
- Microsoft Entra ID tenant: Enter your Entra ID tenant. You can find your tenant, for example, in D365FSCM under Help&Support > About > Licenses.
- Microsoft Entra ID client ID: Enter the client ID here that you noted when setting up the web service application in Microsoft Entra (Azure).
- Save the connection and click on Connect.

- Log in with your Entra ID account (user name & password).
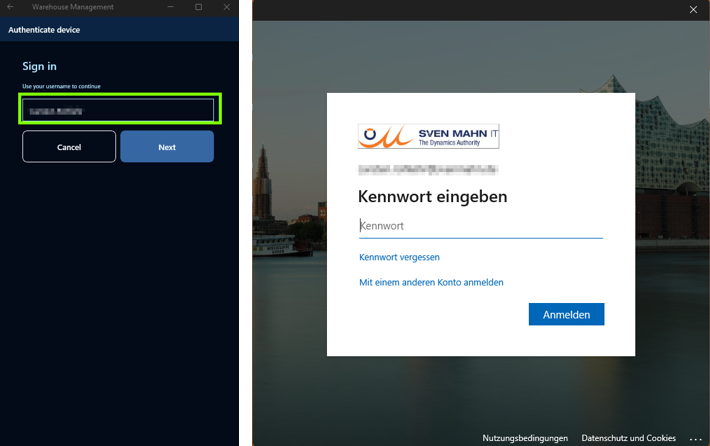
- You will land on the usual login page, where you can now log in with your Warehouse worker and password.


